

After moving into my new apartment, one of the first major projects on my list was rebuilding my entire home network from the ground up. Over the years I’ve experimented with everything from consumer-grade networking gear to increasingly complex UniFi deployments, and each iteration has taught me something new about wireless design, segmentation, performance tuning, and home automation integration.
This latest deployment represents both a fresh start and a consolidation of everything I’ve learned so far.
While wire management is still a work in progress—and both access points are temporarily sitting in suboptimal test positions—I’ve finally reached a point where the network is stable enough to begin fine-tuning, experimenting, and planning for long-term expansion.
What started as a simple internet connection has evolved into the foundation for remote work, gaming, automation, media streaming, security systems, and eventually a much larger home infrastructure when I move back into a house.
________________________________________
Looking Back at the Previous Deployment

My previous home network was designed for a much larger single-family house and evolved gradually over time. It ended up being a fairly mature UniFi setup that included:
- 1 Gbps cable internet
- UniFi CloudKey+
- UniFi Gateway Lite
- UniFi E7, U7 Pro, and U7 In-Wall access points
- Multiple 1G UniFi switches, including a 48-port PoE core switch
It was a solid and highly capable environment. It supported everything from gaming and streaming to a growing HomeAssistant ecosystem, security devices, multiple workstations, and dozens of IoT endpoints.
However, it also became increasingly complex to manage. Over time I found myself over-optimizing rather than simplifying, especially in areas like VLAN segmentation and Wi-Fi tuning.
Moving into an apartment forced a reset—not just physically, but architecturally.
________________________________________
The New Network
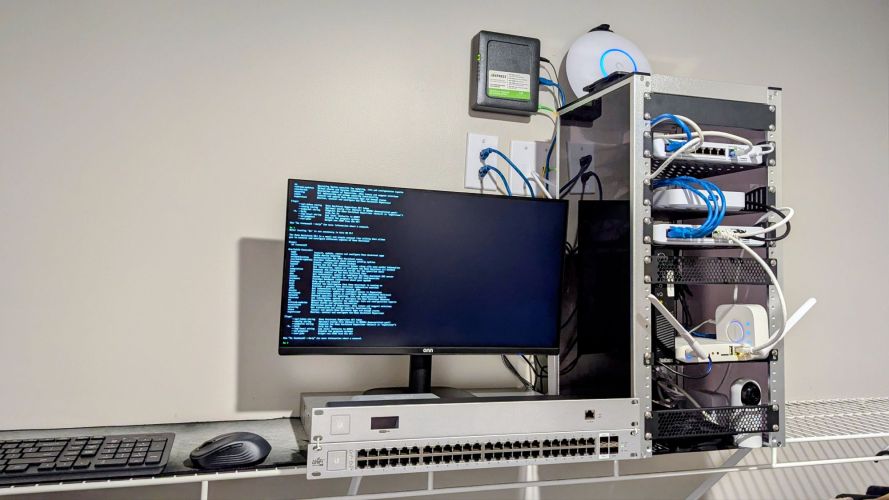
The current deployment is smaller in footprint but significantly faster and more modern in design:
- 2 Gbps fiber internet
- UniFi Cloud Gateway Max
- UniFi E7 Access Point
- UniFi U7 Pro Access Point
- Multiple 2.5 GbE UniFi switches, including a UniFi Device Bridge (UDB)
The apartment itself is deceptively challenging. While smaller than my previous home, it is long and narrow, which creates uneven RF propagation and makes placement more important than raw hardware capability.
The design goal was simple:
Build a network that just works—while still being powerful enough to scale into future automation, security, and multi-gig workloads.
That includes:
Remote work and VPN access
- Large file transfers and cloud administration
- HomeAssistant automation
- Future camera infrastructure
- Gaming and low-latency streaming
- Smart home devices at scale
- Future VLAN segmentation and lab environments
________________________________________
Why I Upgraded to the Cloud Gateway Max
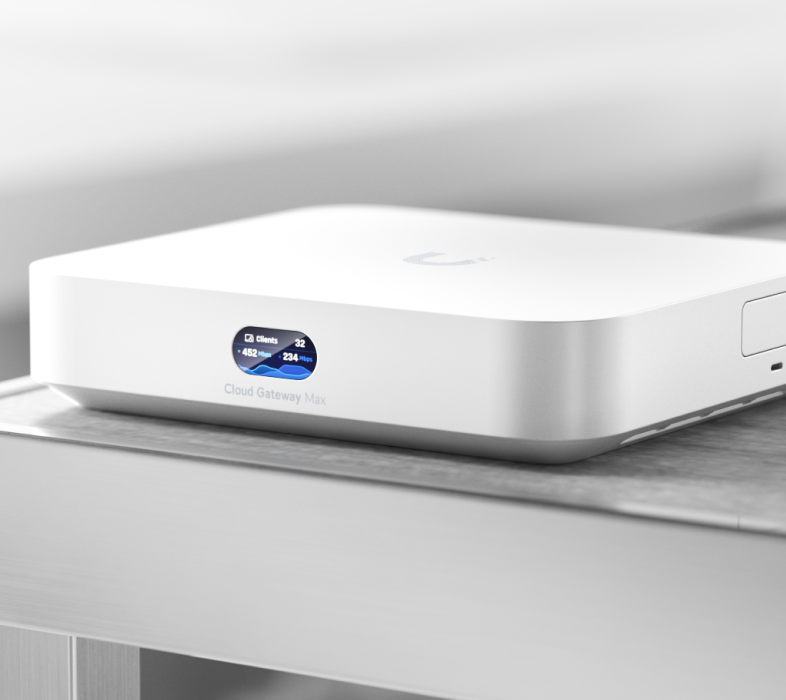
One of the biggest architectural changes was replacing my previous CloudKey+ and Gateway Lite setup with the UniFi Cloud Gateway Max.
This consolidation immediately simplified the control plane.
The Cloud Gateway Max now handles:
- Routing and firewalling
- UniFi Network controller
- IDS/IPS inspection
- VPN services
- Traffic visibility and client analytics
- Future storage expansion (SSD tray installed later)
The performance improvement is noticeable, especially under multi-gig WAN load. With a 2 Gbps fiber connection, the dual 2.5 GbE interfaces eliminate the bottlenecks I previously had when WAN traffic and internal switching competed for bandwidth.
One of the most interesting upgrades planned is SSD expansion. I’ve already ordered the tray, and once installed, I intend to use it for:
- Extended traffic history retention
- Local UniFi logs for deeper troubleshooting
- Potential UniFi Protect camera adoption
- Experimentation with local data pipelines for HomeAssistant
In short, it’s becoming less of a router and more of a small network appliance platform.
________________________________________
Chasing Speed (and Finding the Real Bottleneck)

Naturally, the first thing I tested was performance.
Even without a fully hardwired desktop in place, wireless testing has been surprisingly revealing.
Using the UniFi Device Bridge over Wi-Fi 7, I’ve seen:
- Peak throughput exceeding 2 Gbps in ideal conditions
- Typical sustained speeds between 1.3–1.6 Gbps
- Noticeable variability depending on interference and client position
One of the more interesting discoveries came from my “simulated wired desktop” setup using the UDB. In a controlled test, I was able to sustain near-wired performance for large file transfers across my LAN, which effectively validated Wi-Fi 7 MLO behavior in a real-world environment. I did run ethernet to office computer merely for testing, and pulled 2GB+, getting to 2.3GB for a max.
However, one limitation became very obvious:
The current placement of the E7 access point is the system bottleneck.
Mounted temporarily on a cabinet, the AP is not in an optimal RF position. Signal shadowing and elevation constraints are noticeably impacting both roaming behavior and peak throughput.
________________________________________
Wi-Fi 7 Is Amazing… But Physics Still Wins
The UniFi E7 is easily the most advanced access point I’ve ever deployed.
On paper, Wi-Fi 7 brings:
- Multi-Link Operation (MLO)
- Higher throughput ceilings
- Lower latency paths
- Improved spectrum efficiency
- Better congestion handling
In practice, however, the biggest limitation is still environment.
Walls, furniture, and apartment construction materials have a far greater impact than any protocol upgrade.
One of the most important lessons from this deployment has been:
- Placement matters more than settings, firmware, or even hardware generation.
- A properly mounted mid-tier AP will outperform a poorly placed flagship AP almost every time.
________________________________________
A Few “Experiments” That Didn’t Make the Cut

Like any enthusiast build, not every tweak worked out.
Experiment 1: Frequency-Split SSIDs
I initially separated SSIDs into:
- 2.4 GHz IoT network
- 5 GHz+ performance network
The idea was cleaner segmentation for HomeAssistant devices and better RF control.
In reality, it caused:
- Roaming instability
- Coverage gaps in edge areas
- Devices clinging to weaker radios
- Inconsistent IoT onboarding behavior
I reverted back to unified SSIDs per AP, which immediately stabilized roaming.
________________________________________
Experiment 2: Aggressive Minimum RSSI Tuning
I attempted to enforce strict roaming behavior using minimum RSSI thresholds.
Result:
- Smart bulbs randomly disconnecting
- Motion sensors dropping off during idle periods
- Increased support burden in HomeAssistant logs
Lesson learned: IoT devices do not appreciate being “helped.”
________________________________________
Experiment 3: DFS-Only 5 GHz Band Strategy
At one point, I forced 5 GHz devices onto DFS channels only to avoid interference.
It worked well until:
- Radar detection events caused sudden channel shifts
- Temporary AP unavailability during scans
- Apple devices aggressively reconnecting
This experiment lasted about 48 hours before being rolled back.
________________________________________
Fine-Tuning Wireless Performance
After several iterations, the most effective optimizations were surprisingly simple:
1. Channel Planning Over Automation
Manual channel selection consistently outperformed auto-mode in my environment.
Apartment RF density is high enough that automatic selection tends to “chase noise” rather than stabilize around it.
________________________________________
2. Lower Transmit Power = Better Network Behavior
Reducing AP transmit power improved:
- Roaming consistency
- Client stickiness reduction
- Overall airtime efficiency
- Load balancing between APs
This was counterintuitive but extremely effective.
________________________________________
3. Airtime and Utilization Monitoring
Instead of focusing on speed tests, I shifted toward:
- Airtime utilization
- Retry rates
- Roaming events
- RSSI distribution per client
This gave a much clearer picture of actual network health than peak throughput numbers ever did.
________________________________________
4. Placement Simulation Testing
I temporarily moved APs through five different positions and logged performance over 48 hours per location.
The final placement wasn’t the fastest in benchmarks—but it was the most stable across all device types.
________________________________________
What UniFi Diagnostics Revealed
After reviewing network diagnostics and logs, the overall system health was excellent.
Key findings:
- No routing bottlenecks at the gateway
- No switching congestion issues
- No packet loss at the wired layer
- Minor RF inefficiencies due to AP placement
In other words, the network hardware is not the limitation—the environment is.
________________________________________
HomeAssistant and UniFi: A Surprisingly Powerful Combination
One of the most valuable parts of this entire setup is the integration with HomeAssistant.
Running on a dedicated Lenovo SFF system, HomeAssistant acts as the automation brain for the apartment.
With UniFi integration, I can now:
- Track device presence in real time
- Trigger automations based on network connectivity
- Monitor WAN uptime and latency
- Detect device arrivals/departures
- Generate alerts on infrastructure issues
- Some real automations in use:
- Entry lighting triggered by phone presence
- “Away mode” triggered when all known devices disconnect
- Internet outage notifications pushed to mobile
- Smart plug shutdown when WAN drops for extended periods
This is where networking stops being infrastructure and becomes behavior-driven automation.
________________________________________
Rebuilding the Zigbee Network
Post-move, one of the largest side projects has been rebuilding Zigbee.
Rather than starting fresh, I’ve reused existing devices:
- Motion sensors
- Door/window sensors
- Smart plugs
- Leak sensors
- Environmental monitors
The biggest challenge wasn’t hardware—it was rebuilding reliable automations from scratch.
The guiding principle has been:
Automation should feel invisible. If you notice it, it’s probably too complex.
________________________________________
Future VLAN Architecture
The current network is intentionally flat for simplicity, but the next phase will introduce segmentation:
Planned VLANs include:
- Trusted Devices
- IoT Network
- HomeAssistant Infrastructure
- Camera Network
- Guest Wi-Fi
- Lab / Testing Environment
This will allow:
- Better security isolation
- Cleaner traffic visibility
- Safer experimentation
- More advanced firewall policies
________________________________________
Future Projects
Several experiments are already planned:
- WireGuard VPN deployment for remote access
- UniFi Identity rollout for authentication testing
- Network-based presence detection refinement
- UPS monitoring and graceful shutdown automation
- Energy usage tracking across devices
- Local AI inference integrations for smart home triggers
- Dashboarding UniFi metrics directly inside HomeAssistant
________________________________________
Future UniFi Upgrades
On the hardware side, the next additions likely include:
HomeAssistant Dashboard Monitors (Mounted on Walls)
While I have aold laptop displaying the HomeAssistant dashboard in the kitchen, I would like to get one or two wall-mounted displays installed, probably in the entrance and master bedroom. Amazon has some awesome cheap versions I may try out before upgrading to something nicer when I get back into a house.
UniFi Power Backup
To keep networking stable during outages and prevent automation disruption. I have a large UPS I may use for just my office, as I am already pushing it with hoe much weight I have on the shelf in the master closet. The UniFi UPS would be lighter and look a lot better!
UniFi Protect Cameras
For expanding security coverage as the system matures. I will slowly start to transition to a fully UniFi camera system, but will wait till the new house, and just use a mix of Nest and UniFi devices for now.
Additional Access Points
Potentially required when moving into a larger home with structured cabling. Unless they have new access points by then, I will probably get two or so more E7’s.
________________________________________
Looking Toward the Next House
This apartment setup is essentially a controlled lab environment.
Everything being tested here—placement strategies, VLAN design, automation logic, and hardware selection—will directly influence the next home deployment.
Future plans for that environment include:
- Full structured cabling
- Ceiling-mounted AP deployment
- Dedicated network rack
- Multi-gig switching throughout
- Full UniFi Protect ecosystem
- UPS-backed infrastructure
- Expanded Zigbee + sensor deployments
- Local AI and automation services
________________________________________
Lessons Learned
If there are four core takeaways from this deployment, they are:
1. Don’t over-engineer early
Start simple and scale complexity only when needed.
2. Coverage beats speed
Stability matters more than benchmark performance.
3. Smart homes depend on network stability
Most automation failures are actually networking issues.
4. Placement is everything
No software setting can compensate for bad RF geometry.
________________________________________
Final Thoughts
This network is still evolving, but it already represents one of the most capable home environments I’ve built.
With 2 Gbps fiber, Wi-Fi 7 access points, UniFi routing, HomeAssistant automation, and a growing Zigbee ecosystem, the foundation is in place for years of expansion.
The biggest realization through all of this is simple:
The best networks aren’t the most complicated—they’re the most intentional.
And as this system continues to evolve, one thing is certain: there will be more experiments, more upgrades, and more lessons learned along the way.
Fortunately, that’s exactly what makes building it enjoyable.
Categories: Networks


