


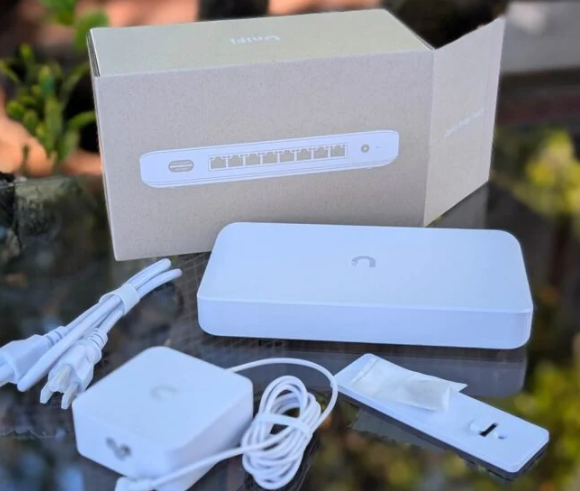
One thing I’ve learned from building and constantly tinkering with my home network is that there’s almost always something that can be improved. Whether it’s adjusting an access point, experimenting with different settings, or moving equipment around for the hundredth time, I always seem to find another reason to nerd out a bit.
This past weekend, that meant spending a good chunk of time troubleshooting my UniFi Device Bridge Switch (UDB-Switch), which has been giving me some intermittent connectivity issues. I’ve been using it for quite a while now, and although the performance has generally been impressive, the occasional disconnects from its parent access point have been getting pretty annoying.
I previously wrote a full review of the UniFi Device Bridge Switch, covering my initial experience with the hardware and how it fits into my network. This time, I figured I’d share some of the troubleshooting and experimentation I’ve been doing, along with a pretty impressive speed test result.
Why I’m Using a Wireless Bridge in the First Place
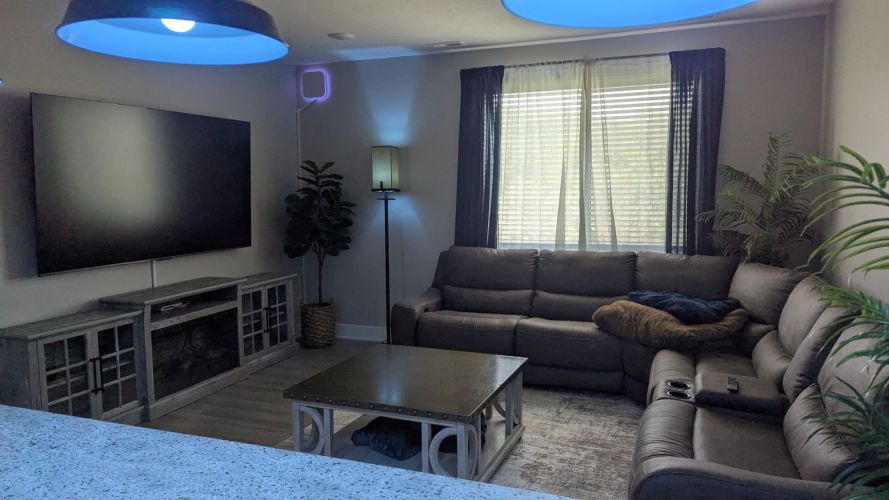
My home network is built around UniFi equipment, with a Cloud Gateway Max handling routing, a combination of 2.5 GbE UniFi switches, and two Wi-Fi 7 access points: a UniFi E7 and a U7 Pro. My internet connection is 2 Gbps fiber through Great Plains Communications, so I’ve got plenty of bandwidth to work with.
The problem is that my office, which houses my main gaming PC, work laptop, and the rest of my desk setup, doesn’t have an Ethernet connection back to my network rack. Running cable to the room isn’t really an option at the moment, so I decided to go with a wireless bridge instead.
That’s where the Device Bridge Switch comes in. It connects wirelessly to one of my UniFi access points while providing Ethernet connectivity to the devices in my office. It’s a pretty convenient solution, especially when you’ve got equipment that benefits from a wired connection but can’t easily get an actual cable back to the network rack.
For the most part, it’s worked well. Before making any changes, I was averaging around 1.3 Gbps download speeds, which is honestly pretty impressive considering the connection is wireless. The problem wasn’t really the speed, though. It was the random disconnects between the bridge and its parent mesh access point, my UniFi E7. The E7 itself is hardwired, through the 2 ethernet ports under my TV (which then connect to 2.5GB switch). In the perfect world, I would drill through the wall and run a new cable, but, as I am renting, my options are limited.
When you’re gaming or working remotely, even a brief interruption can be frustrating. I’d much rather have a stable 1.3 Gbps connection than something faster that randomly drops out. As World of Warcraft: Forever comes out tomorrow, let’s just say I am preparing my setup to quest and level up like a lunatic (not that I have the time for it much anymore!)
Moving Things Around (Again)
I decided to start with the simplest possible solution: physically moving the bridge around my office to see if I could improve the wireless connection. Before, I simply had the switch laying on my desk, with me kind of sitting in the path, blocking even more signal than necessary, as the E7 is already separated by a wall with a closet on its path to the UDB switch.
I’ve got the Device Bridge Switch mounted on a tripod, which actually makes this kind of testing pretty convenient. Rather than having it permanently mounted somewhere, I can move it around, adjust its height, and experiment with different positions without much effort.
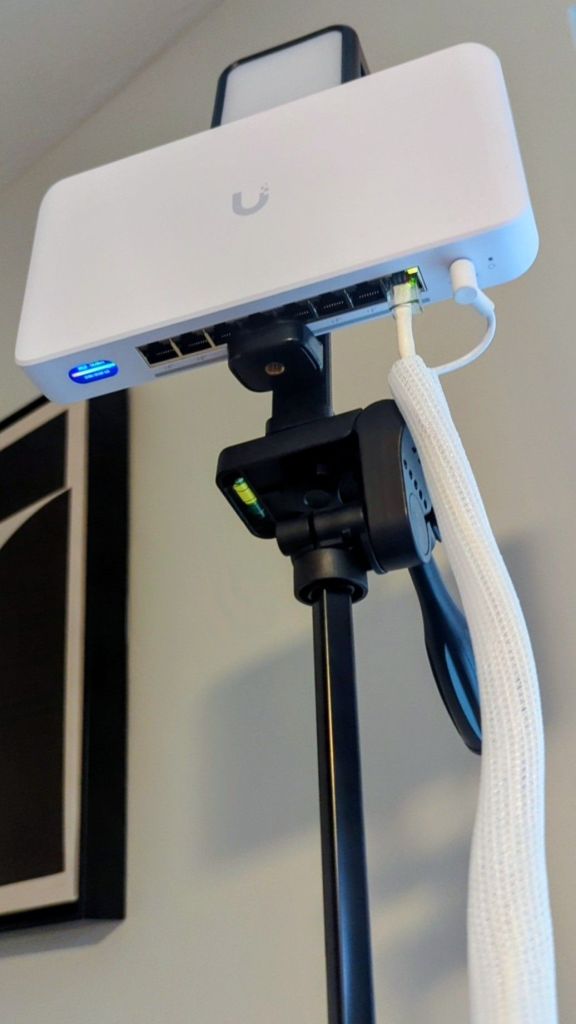
I spent some time trying different locations around the room, adjusting the height and orientation, and seeing how the bridge behaved in each position. One of the locations I experimented with was near the window, where I could position it a little differently from where it had been sitting previously.
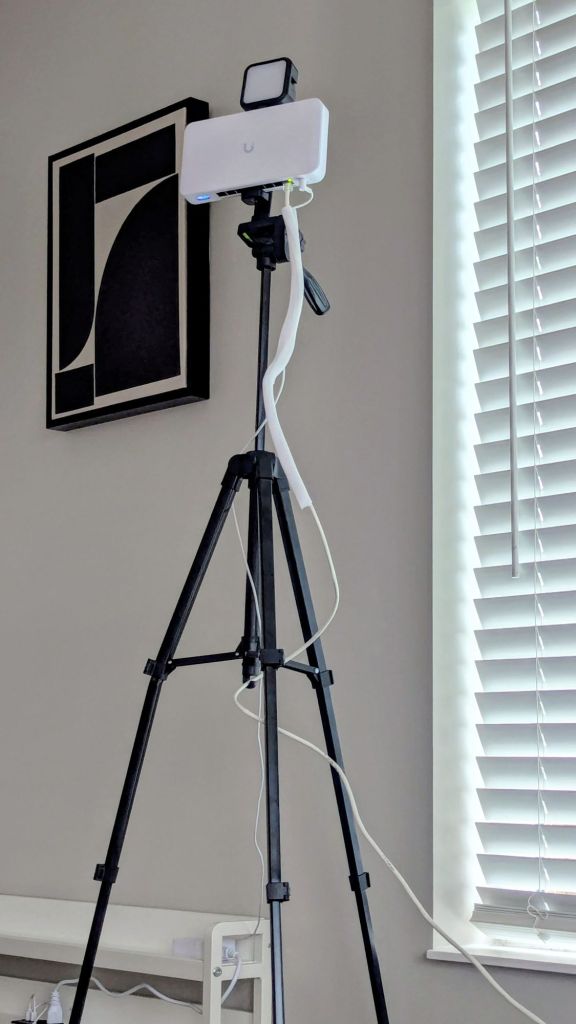
It’s easy to forget just how much physical placement matters with wireless equipment, especially when you’re using newer Wi-Fi 7 hardware. You’d think that with the capabilities of something like the E7, moving a device a few feet wouldn’t make much difference, but that definitely isn’t always the case.
Walls, furniture, other electronics, and even the angle of the equipment can affect wireless performance. In my case, I was mostly interested in finding a position that would maintain a stronger, more consistent connection to the E7. I wasn’t exactly running a controlled scientific experiment here. I didn’t document every position or record signal measurements for each one. It was more a matter of moving the bridge, checking the connection in UniFi, running some speed tests, and seeing what worked best.
Sometimes that’s just how home networking goes.
Experimenting With Mesh Parent Selection
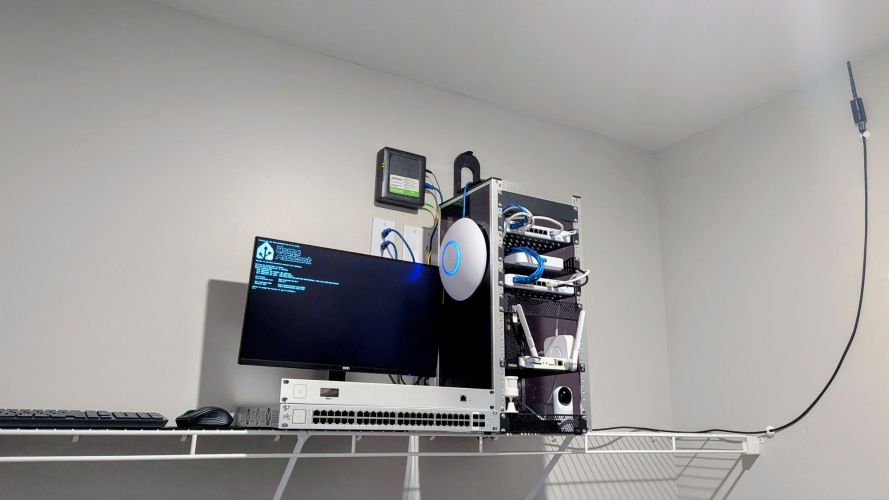
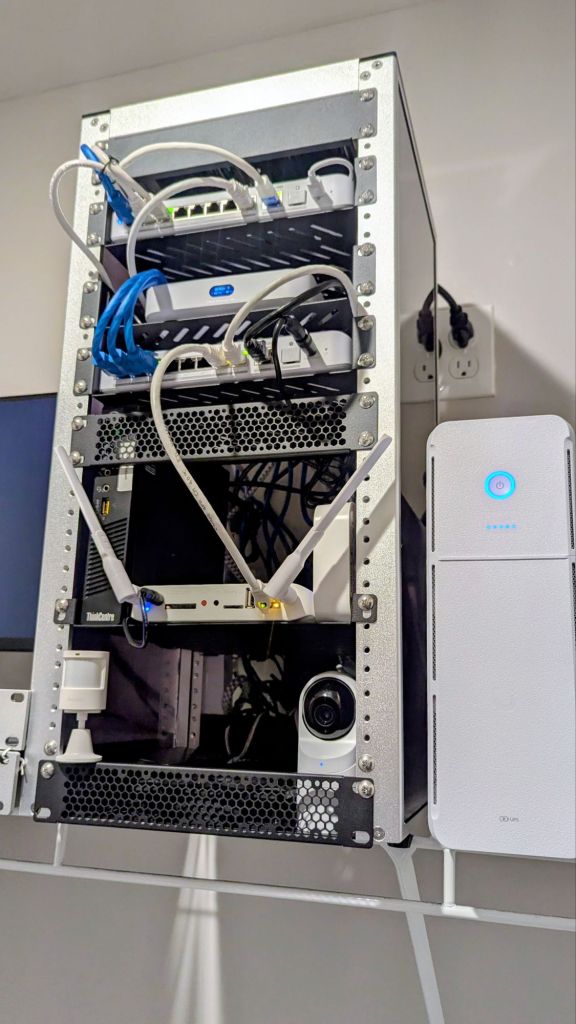
Another thing I wanted to revisit was how UniFi handles wireless mesh parent selection. I’ve got two access points on my network, the E7 and a U7 Pro, and their locations are quite different. The E7 is normally the parent device for my bridge, while the U7 Pro is mounted in my network rack inside a closet.
The U7 Pro’s positioning is a little unusual because I’ve got it pointed toward the front door at the bottom of the stairs. I was previously having problems with my Google Nest doorbell camera maintaining a reliable Wi-Fi connection, so I adjusted the access point to provide better coverage in that direction. That helped address one area of my network, but it also means the U7 Pro isn’t necessarily positioned in the best way to serve my office.
I spent some time experimenting with UniFi’s automatic mesh parent selection, allowing the bridge to choose between available compatible access points rather than keeping it tied to the E7. In theory, automatic selection sounds like the obvious choice. If you’ve got multiple access points available, why not let UniFi figure out which one provides the best connection?
In practice, things aren’t always that straightforward. The access point with the strongest signal isn’t necessarily going to provide the best overall performance, especially when you factor in positioning, interference, and the capabilities of the different devices. I also experimented with manually selecting the E7 as the parent, since that’s the access point I’ve generally had the best results with.
I can’t say that one particular mesh parent setting was responsible for the speed improvement I eventually saw, but it was worth experimenting with. Having multiple access points available is useful, although I still prefer knowing exactly which one my bridge is connecting to, particularly when troubleshooting.
And, of Course, I Started Messing With Settings
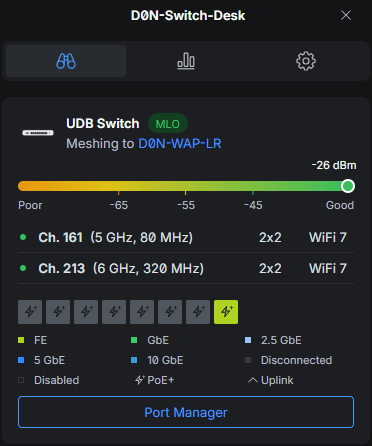
Anyone who’s spent much time in the UniFi Network application knows how easy it is to go down a rabbit hole experimenting with different settings.
That’s pretty much what happened here.
Along with moving the bridge and testing mesh parent selection, I spent a fair amount of time reviewing and adjusting wireless settings. I experimented with different configurations, looked at channel selection and channel widths, and generally tried to see what would give me the best combination of speed and stability. Transmit power, interference, and the wireless environment were also things I considered while working through the problem.
Unfortunately, I didn’t keep a detailed record of everything I changed. I was more focused on getting the connection working better than documenting every individual adjustment, which I probably should have done considering I ended up deciding to write about it. However, these are the current settings I achieved the best results from.
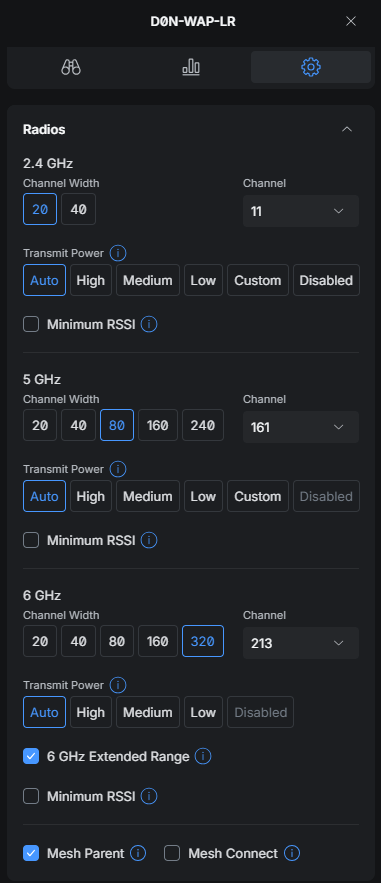
It’s also worth mentioning that some of these settings are controlled by the parent access point rather than the bridge itself, and the options available depend on the hardware and firmware you’re running.
I wouldn’t recommend randomly changing a bunch of settings and assuming that whatever happens afterward must have been caused by one of them. Ideally, you’d change one thing at a time and compare the results. I wasn’t quite that disciplined this time around.
Still, between the physical repositioning and the configuration changes, I started seeing some pretty interesting results.
From 1.3 Gbps to 2.3 Gbps
This was easily the most surprising part of the whole experiment.
As I mentioned earlier, before moving the bridge around, I was typically seeing download speeds averaging around 1.3 Gbps. That’s already excellent performance for a wireless bridge, and I certainly wasn’t expecting some massive improvement just from changing its location.
After spending time experimenting with placement and settings, I ran another speed test using FAST.com and ended up seeing 2.3 Gbps download. This result was repeated over and over.
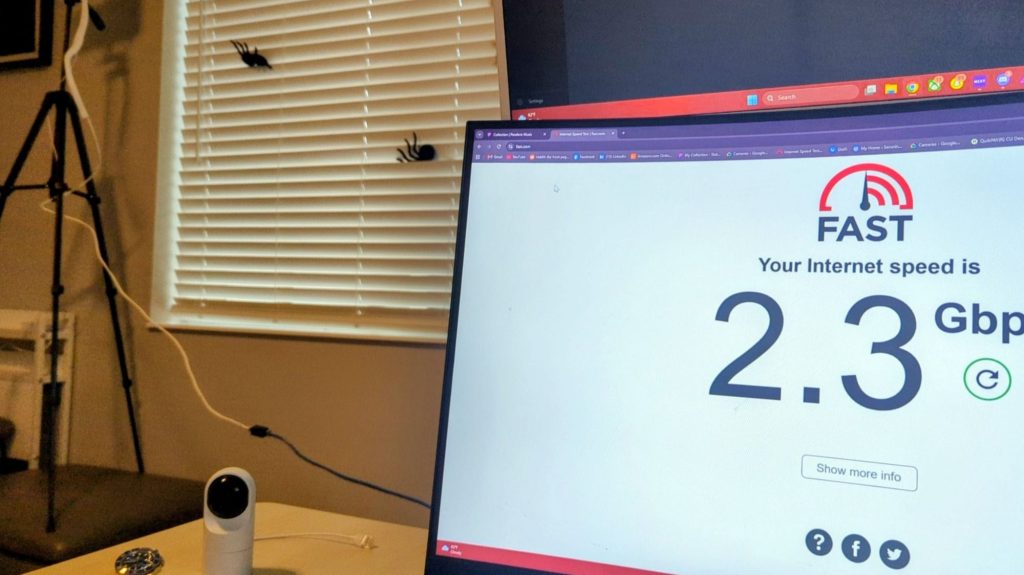
I had to look at that one for a second.
Considering I’m paying for a 2 Gbps fiber connection, seeing 2.3 Gbps on a device connected through a wireless bridge was pretty satisfying. That’s roughly a 1 Gbps increase compared to what I had been averaging before, or about a 77% improvement.
Now, to be fair, that doesn’t mean I’m suddenly averaging 2.3 Gbps all day long. This was a speed test result, and I’d need to run more tests over a longer period to determine how consistently I can achieve those speeds at different times of the day (to account for more device activity and such).
There are also plenty of variables involved with internet speed tests, including the test server, network congestion, and the equipment involved. A FAST.com result isn’t the same thing as measuring the actual wireless link with something like iPerf3.
But even with those caveats, it’s still a pretty impressive result. I’ve always been a fan of seeing just how much performance I can squeeze out of my home network, and this was definitely one of the more satisfying improvements I’ve seen from simply experimenting with placement.
Speed Is Great, but Stability Is What I Really Want
As much as I enjoyed seeing 2.3 Gbps on the screen, that wasn’t really the reason I started messing with the bridge in the first place. The random disconnects were what prompted all of this, and ultimately, fixing those is going to matter a lot more than achieving another impressive speed test. The frustrating thing about intermittent wireless issues is that they can be difficult to reproduce. Everything might work perfectly for hours, or even days, and then suddenly the connection drops for no obvious reason. That’s especially annoying when the bridge is providing connectivity to equipment I use for both gaming and work.
For now, I’m going to leave the bridge in its new position and see how it behaves over the next several days. I’ll be keeping an eye on the UniFi logs, wireless uplink status, and whether I continue seeing unexpected disconnects. I’d also like to do some more thorough testing using iPerf3 to get a better idea of the actual throughput between devices on my local network. That would eliminate some of the variables introduced by internet-based speed tests. Continuous ping monitoring would also be useful, particularly for identifying brief interruptions or packet loss that might not be obvious during normal browsing.
If the connection remains stable, I’ll consider the experiment a success. If not, I guess I’ll be moving the tripod around again. Eventually, I will probably just take the leap and mount this switch on the wall as high up as I can get it, I just need to order some more cabling to get some custom lengths. Ideally, it would be nice to have this switch with actual line-of-sight to the E7, which I actually think I can manage, but we will see if that is necessary.
Final Thoughts
One of the reasons I enjoy working with UniFi equipment is the amount of visibility and control it gives me over my network. There’s always something to monitor, adjust, or experiment with, which is great if you’re someone who enjoys tinkering with technology.
The Device Bridge Switch has been an interesting piece of hardware to work with. It solves a very real problem in my setup by providing high-speed Ethernet connectivity to a room where running a cable isn’t practical, and the performance I’ve been able to get out of it has been impressive.
At the same time, the intermittent mesh disconnects have been a reminder that wireless networking, even with expensive Wi-Fi 7 equipment, isn’t always as straightforward as we’d like it to be.
Going from an average of around 1.3 Gbps to an observed 2.3 Gbps download speed was a nice surprise, especially considering that much of the experimentation involved simply moving the bridge around my office.
Whether the changes have actually solved the stability issues remains to be seen, but I’m cautiously optimistic.
If you’re using a UniFi Device Bridge Switch or another wireless bridging solution and aren’t getting the performance you expected, it’s worth experimenting with placement before assuming you need different hardware. Sometimes a relatively small adjustment can make a surprisingly big difference.
And if you’re interested in the hardware itself, you can check out my original UniFi Device Bridge Switch review, where I go into more detail about the device and my initial experience setting it up.
For now, I’m just hoping the bridge stays connected long enough for me to enjoy those speeds without having to troubleshoot it again next weekend.
Categories: Networks


