

Well, That Was a Busy Weekend!
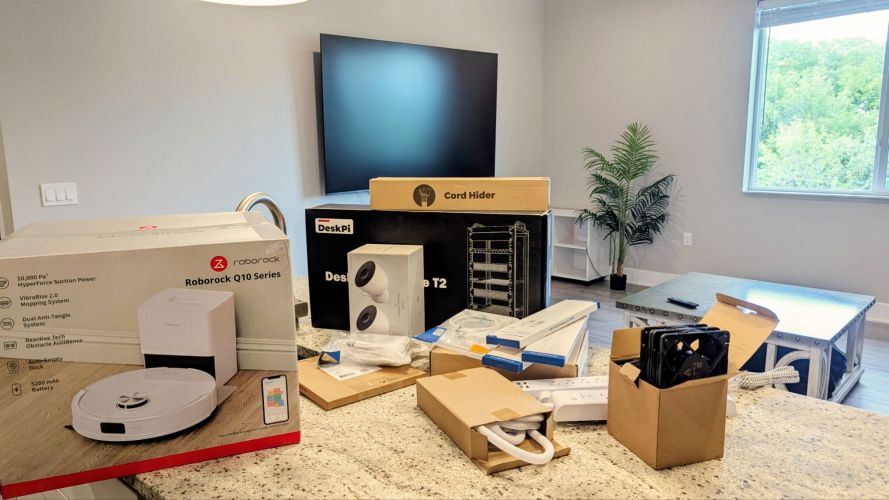
I received a rather hefty shipment of tech goodies this weekend, including a GeeekPi RackMate T2 rackmount, two additional Nest cameras, cable management accessories, ethernet cables in various lengths, a Roborock Q10 S5+ Robot Vacuum and Mop, two UniFi Switch Flex 2.5G PoE switches, a UniFi M.2 SSD Storage Tray for my UniFi Cloud Gateway Max, a 5-pack of ARCTIC P12 Pro PST 120mm fans, USB-to-4-pin fan power adapters, large surge protector power strips, and a 1TB SSD that, of course, never arrived.
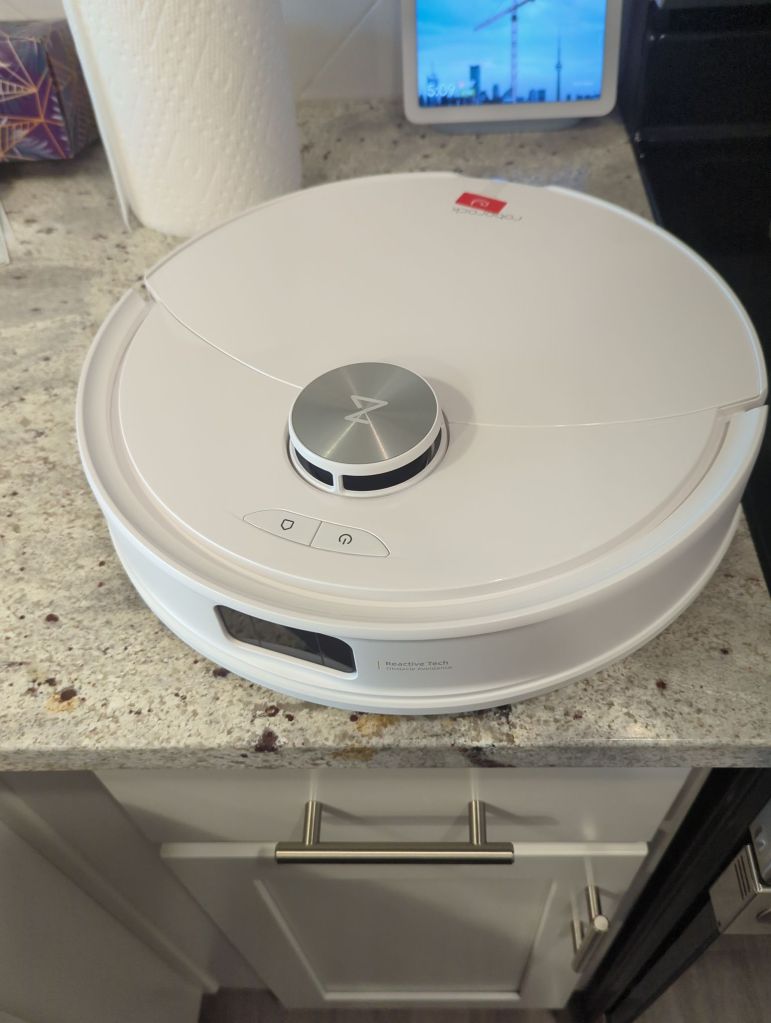
The first thing I did after bringing everything inside was get the Roborock Q10 S5+ up and running so it could clean while I worked. I’ll save the full review for a future post, but coming from both Shark and Roomba devices, I was genuinely impressed. The cleaning performance, quiet operation, overall appearance, and setup experience were all excellent. Mapping my home was almost effortless, and I’m looking forward to integrating it with HomeAssistant in the near future.

Building the Rack
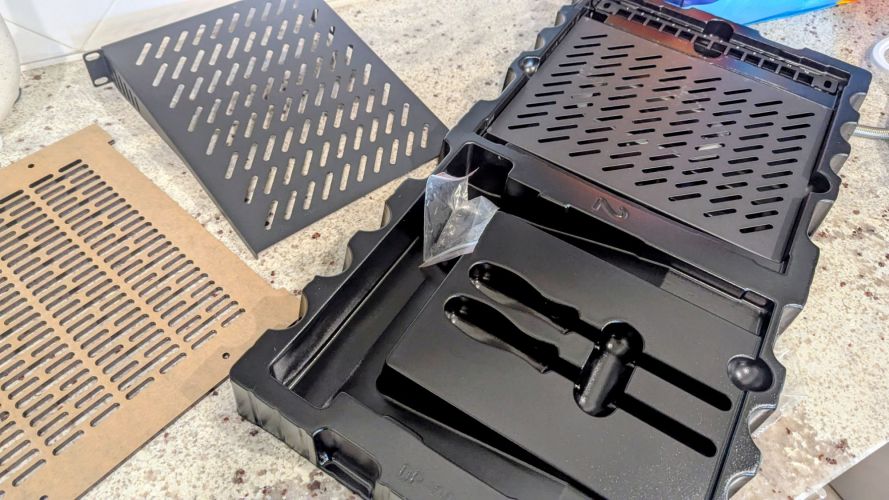
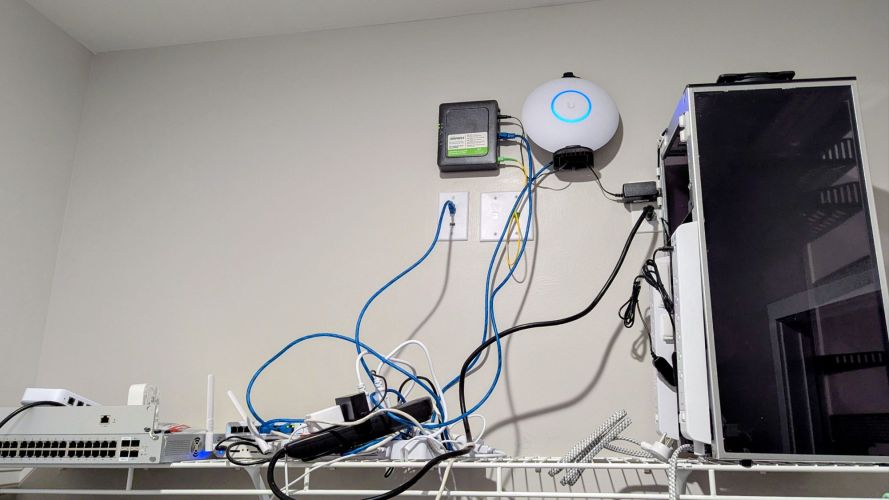
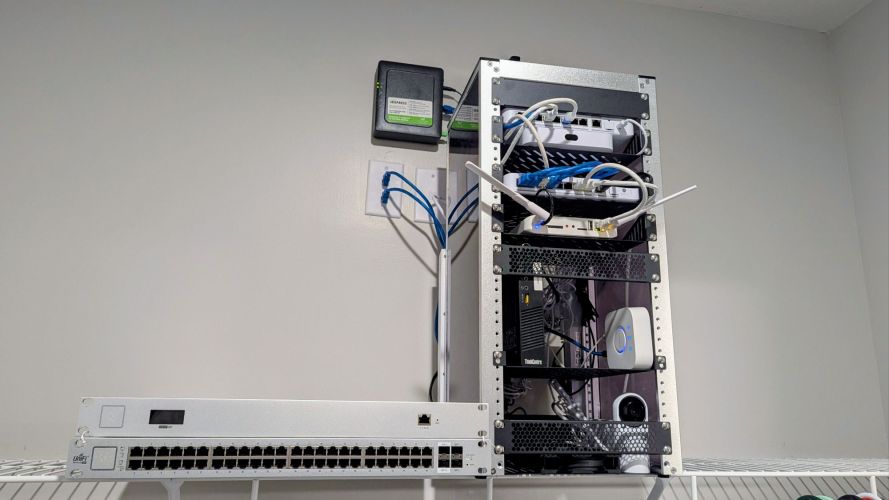
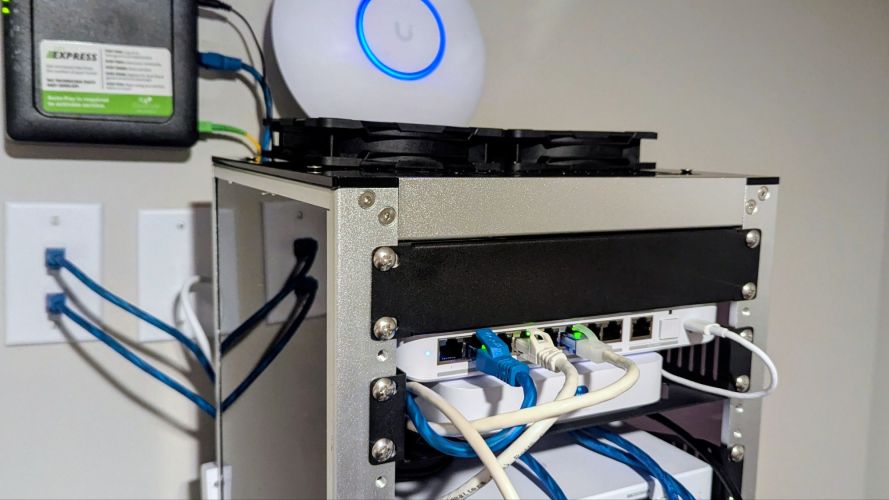
With the UniFi equipment scheduled to arrive the following day, I decided to start assembling the GeeekPi RackMate T2. Overall, I think it’s an excellent product, especially for homelab enthusiasts who don’t have the space for a full-size rack. It provides a compact, professional-looking solution that fits surprisingly well into a home office environment.
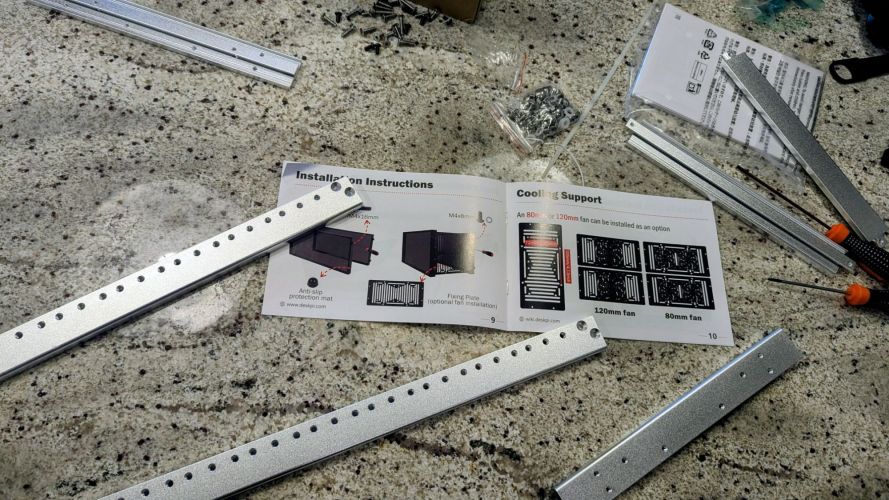
That said, the instruction manual left a lot to be desired. The assembly diagrams use dark images that make it difficult to distinguish mounting holes and component orientation. As a result, I found myself partially disassembling and reassembling sections multiple times before everything lined up correctly. Fortunately, once assembled, the finished product looked fantastic and felt remarkably sturdy.
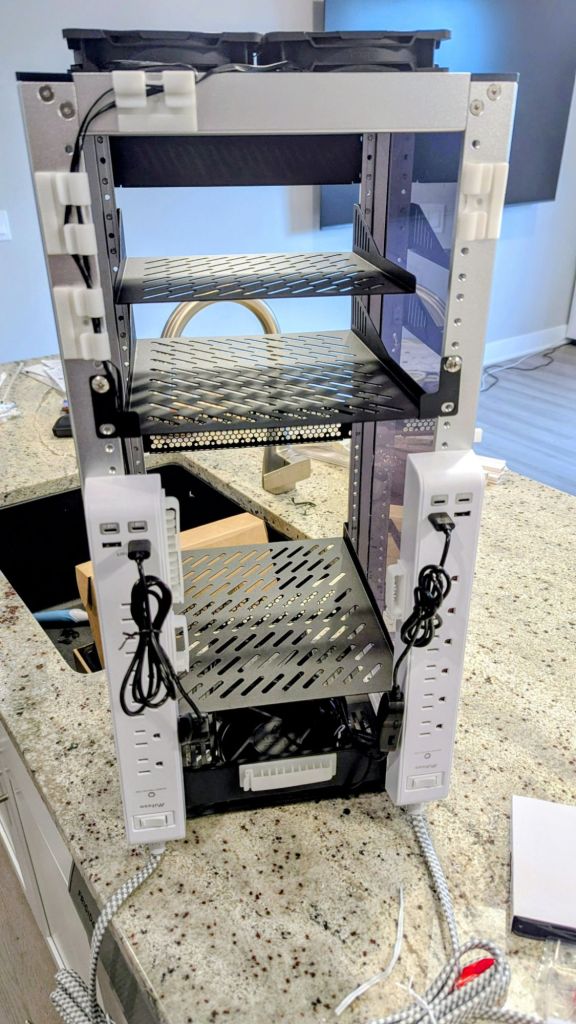
I’m still experimenting with shelf and device placement and may eventually add a couple of RGB light strips for aesthetics. Even in its current state, though, the rack does an excellent job of organizing my equipment, keeping everything neatly contained and safely out of reach of curious little hands.
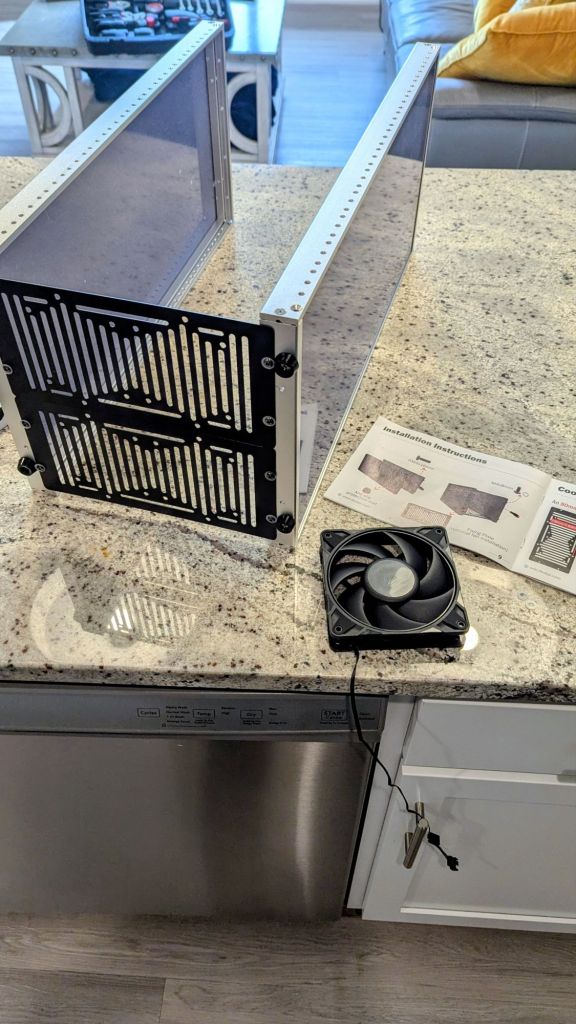
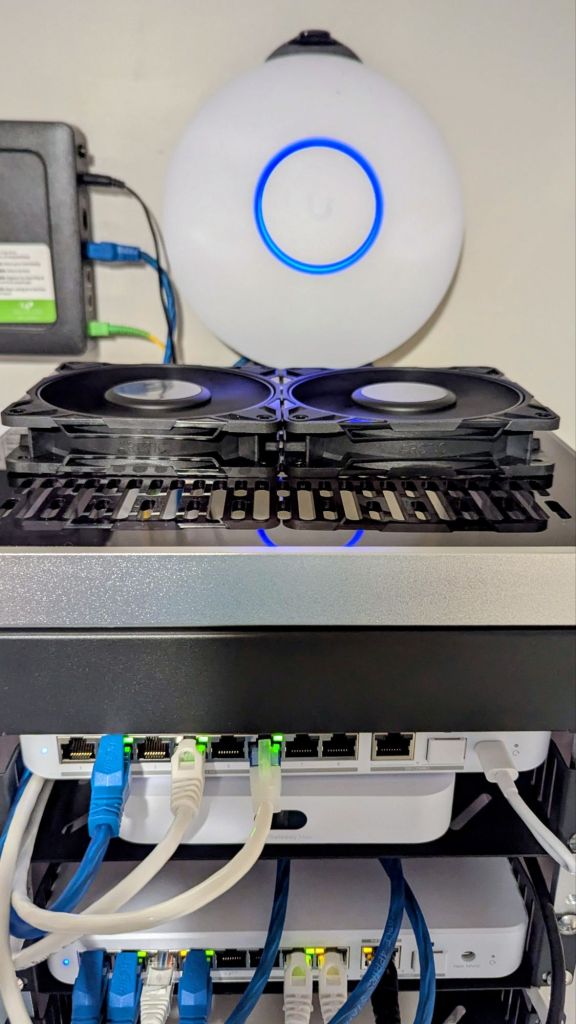
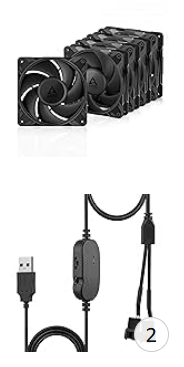
One aspect I’m particularly happy with is the cooling configuration. I installed four ARCTIC P12 Pro PST 120mm fans—two intake fans at the bottom and two exhaust fans at the top—to create a clean bottom-to-top airflow path. The P12 Pro fans move a surprising amount of air while remaining relatively quiet, making them a great choice for a rack that sits in a living space rather than a dedicated server room.
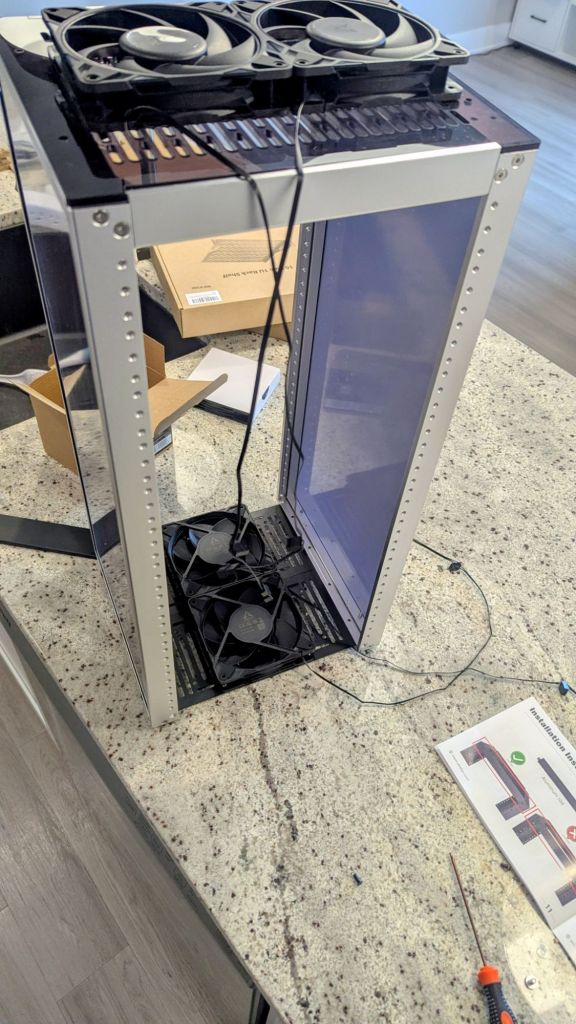
To avoid creating airflow restrictions, I also positioned equipment strategically throughout the rack. The fans are powered by dual 4-pin-to-USB adapters, which not only simplify power delivery but also allow for speed adjustments when necessary. In addition, I installed extra shelves and mounted two large surge protector power strips with integrated USB and USB-C charging ports to the rear of the rack. These additions significantly improved cable management and power distribution.
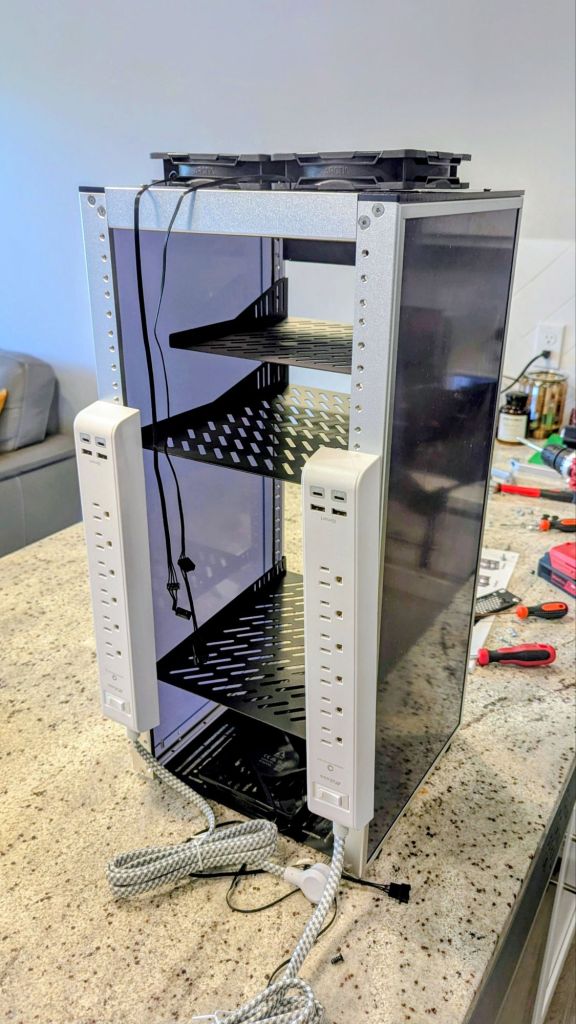
I also added a ton of cable holders and such, to better route and control the mess of wires in the back of the rack.
Network Upgrades
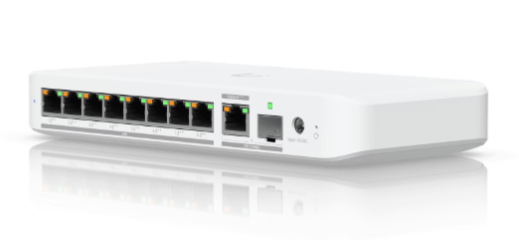
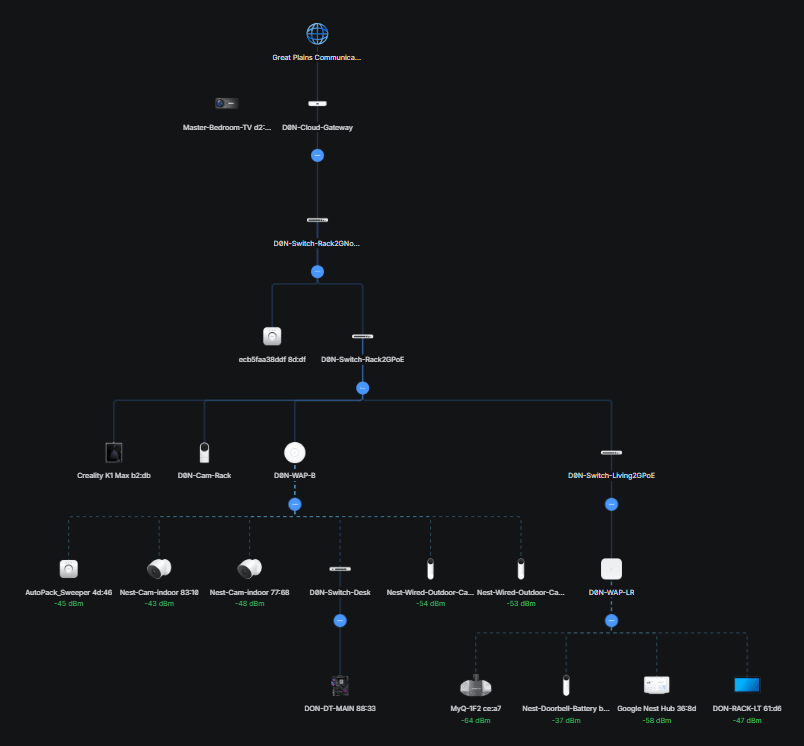
Once the UniFi packages arrived, I got to work upgrading the network. After unboxing the new switches, I quickly learned that this model could be powered with just PoE (cool, right?). Well, that also means the don’t include power adapters, so I will need to pick up another. Thankfully, I did have PoE++, and had a power adapter from an old switch I could use for one of them, but I think running it on a external adapter would provide better performance than just PoE.
I replaced one of my existing non-2.5GbE switches in the rack with a new UniFi Switch Flex 2.5G PoE, and I swapped out a non-PoE 2.5GbE switch in the living room with the second Flex 2.5G PoE unit. These switches are small but incredibly versatile, providing multi-gigabit connectivity along with PoE support in a compact form factor.
With more devices supporting faster networking standards, upgrading key switching points to 2.5GbE helps eliminate bottlenecks and ensures the infrastructure is ready for future expansion. While many devices still operate at 1GbE, having a multi-gig backbone means file transfers, backups, and high-bandwidth workloads can take advantage of the additional capacity when available.
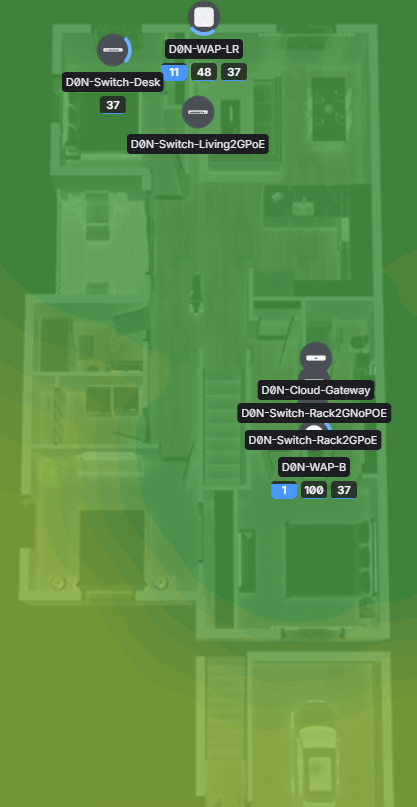
I also relocated my UniFi Device Bridge (UDB) to my office since running cables there is currently a challenge—something I hope to solve when I move into a larger home next year. The Device Bridge connects wirelessly to my living room UniFi E7 access point using Wi-Fi 7 technology and Multi-Link Operation (MLO), providing performance that feels remarkably close to a hardwired connection for my primary workstation.
I had forgotten just how finicky the UDB can be during setup. It took several reboots and factory resets before everything cooperated. If memory serves, adopting the device while connected via Ethernet was ultimately the trick that got it working properly.
Unfortunately, the missing 1TB SSD prevented me from installing the M.2 storage tray in my Cloud Gateway Max. I’ll likely order another drive and complete the upgrade later. In reality, local video storage isn’t a major priority since most of my cameras are Nest devices. One of the biggest advantages of the Nest ecosystem is the ability to quickly access camera feeds from virtually anywhere, including Google TVs, Nest displays, my Pixel Watch, and my phone. The SSD would have been more useful for simplifying some of my UniFi Protect and CloudKey-related experimentation.
Expanding Camera Coverage
With the networking work completed, I moved on to expanding my security camera coverage.
One of the new Nest cameras was installed in the garage, while the other was mounted on the balcony. With those additions, I’ve effectively completed surveillance coverage of the home. Every entrance and exit is now visible, along with hallways, stairways, and the primary common areas.
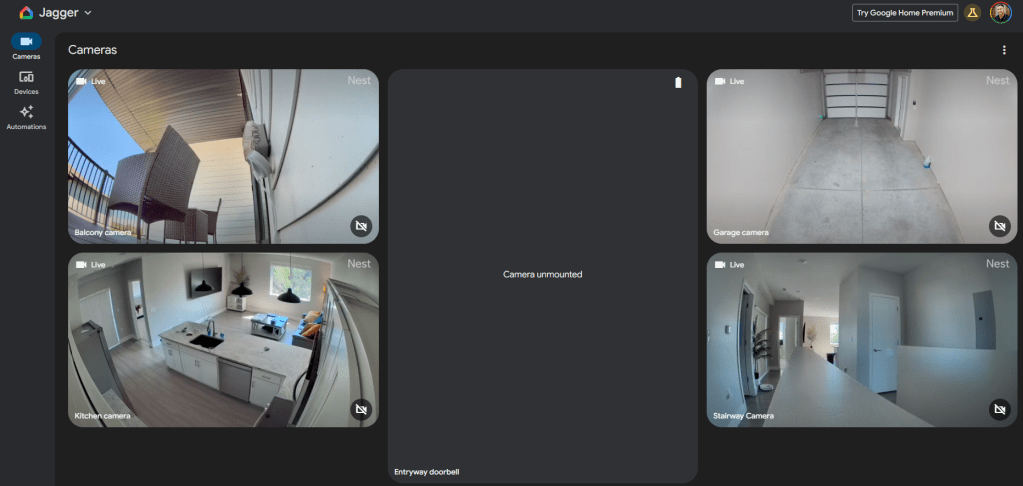
The only camera placement I’m still debating is the Nest Doorbell. Ideally, I would mount it outside the front door, but I’m not entirely sure whether building rules would allow it. I briefly installed it on the exterior door frame before reconsidering the possibility of complaints from neighbors or management.
For now, I may install it inside my entryway instead. While that would eliminate most of the traditional doorbell functionality, it would still provide motion detection, person alerts, package monitoring, and additional camera coverage where it matters most.
Looking Ahead
Overall, it was an incredibly productive weekend.
The new place is now fully 2.5GbE-capable, with hardwired connections wherever practical. Wireless performance has also been excellent, and I routinely see speeds exceeding 1.5 Gbps depending on network conditions, with even better performance on Wi-Fi 7 devices. It certainly helps that my ISP consistently delivers around 2.2 Gbps symmetrical service—slightly higher than the advertised speeds.
There are still a few items left on the project list. I need to clean up some remaining cable runs throughout the house, properly mount the E7 access point instead of leaving it tucked away in a cabinet, and pick up a small monitor so I can finish bringing my HomeAssistant server back online.
I’m especially excited to get my smart home operational again. Once HomeAssistant is fully configured, I plan to continue expanding automation throughout the house. Future projects include replacing Alexa and Gemini integrations with a more customized local AI assistant, upgrading recessed lighting to Philips Hue fixtures, and eventually replacing the remaining bulbs in lamps and ceiling fans to create a more unified smart lighting ecosystem. I also need to connect the preexisting smart devices into my HomeAssistant server, including a MyQ smart garage door opener, front lock, and thermostat.
As always, just when one project finishes, another one is already waiting.
Categories: Networks


