


Smart home gear has gotten increasingly powerful, but stitching everything together into a reliable, low-latency, and privacy-respecting system still takes a little planning. Since I have my Home Assistant server running, my UniFi network gear dialed in, and have configured various integrations within my home, I am ready to dive into more security-focused devices, such as motion, temperature, humidity, and door sensors, as well as more smart bulbs (have a few HUE products at the moment).
So, after researching my options, I am looking to add a Zigbee-powered sensor and automation layer, and decided on the following devices:
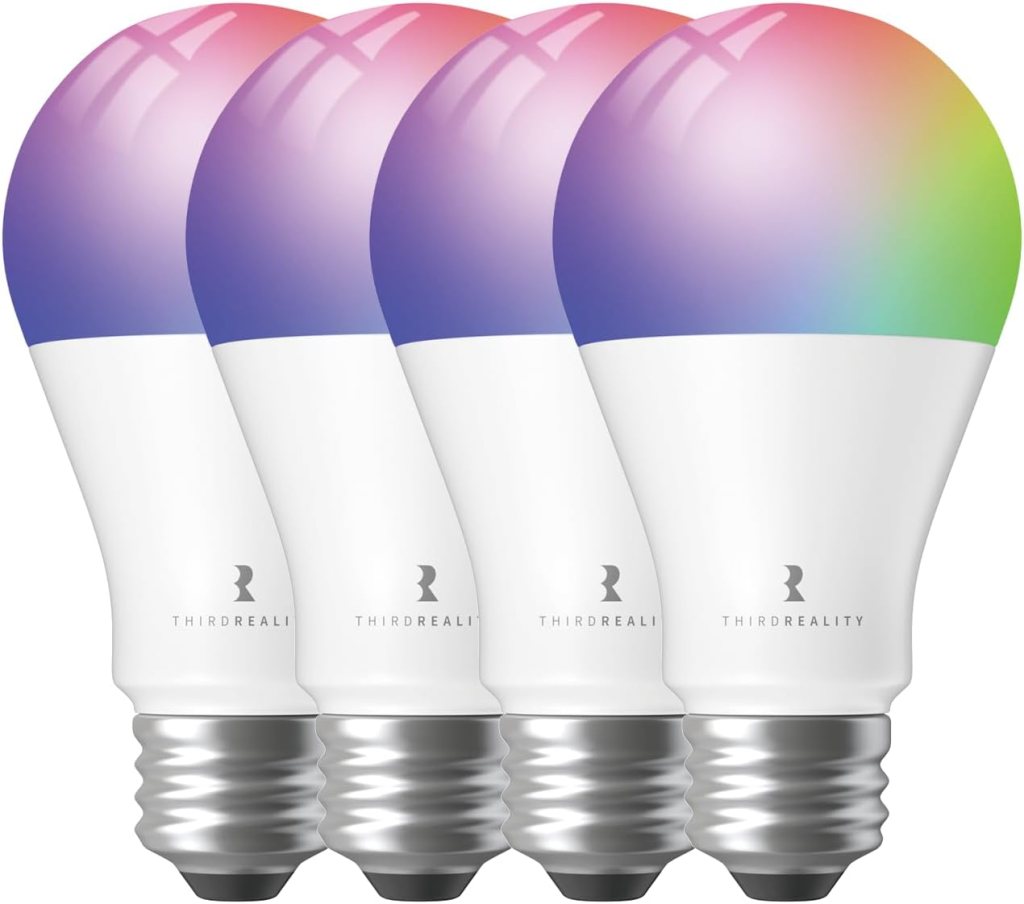
- THIRDREALITY Zigbee Smart Color Bulb (4-pack)
- THIRDREALITY Zigbee Smart Plugs (4-pack)
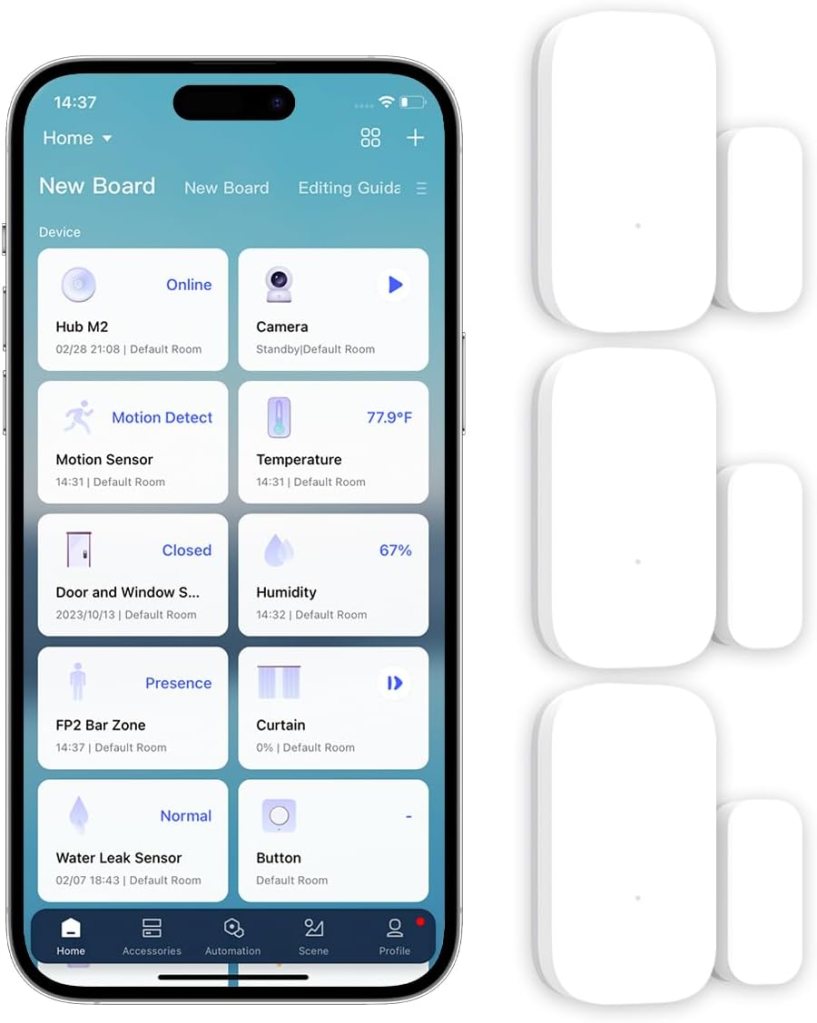
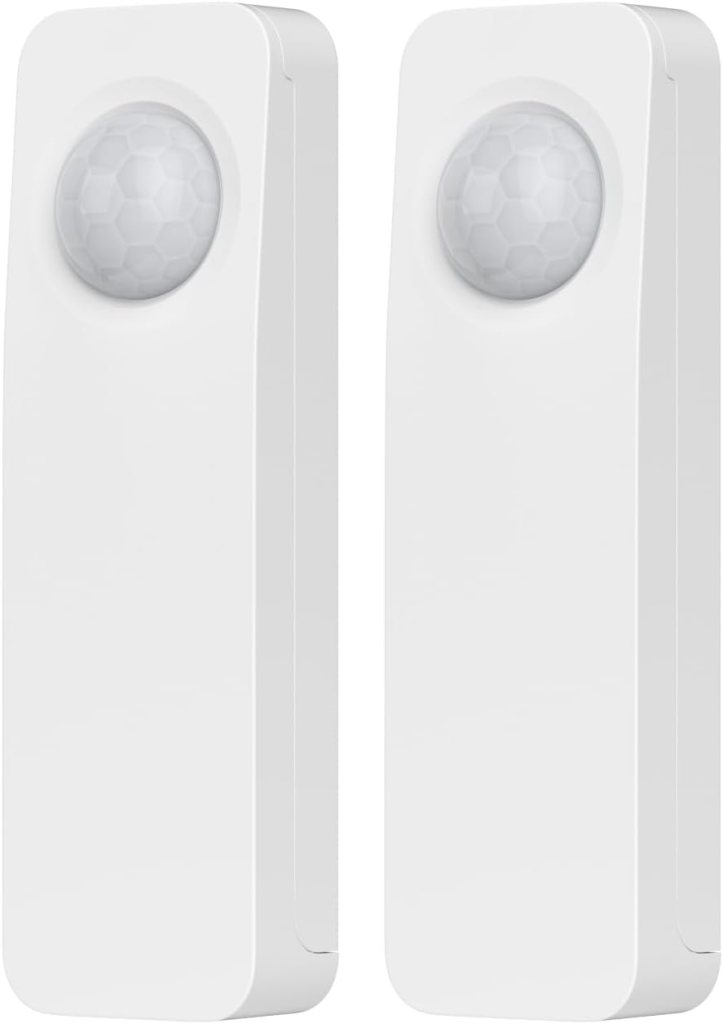
- Aqara Motion Sensor P1 (3-pack)
- Aqara Temperature & Humidity Sensors (3-pack)
- Aqara Door/Window Sensors (3-pack)
- SONOFF Zigbee 3.0 USB Dongle Plus Gateway
- ITD ITANDA 10ft USB 3.0 Extension Cable
Most of these devices can be found on Amazon for under $50, but if you can wait a bit, I hear AliExpress knockoffs often have the same performance and cost substantially less (check out bulk deals).
This post walks you through how to approach building the system, why these devices are good picks, what to watch out for, and how to avoid the classic pitfalls of Zigbee networks—especially in mixed-band Wi-Fi environments like my UniFi setup.
Why Zigbee Is the Right Tool for This Job
Zigbee remains one of the most stable ways to deploy battery-powered sensors (motion, contact, temp/humidity). Reasons include:
- Low power usage → long battery life
- Mesh networking → excellent range
- Local control through Home Assistant
- Fast, reliable automations
The SONOFF Zigbee 3.0 USB dongle I selected is powerful, widely supported, and works beautifully with Zigbee2MQTT or the ZHA integration inside Home Assistant.
Recommended Architecture
1. Plug the SONOFF dongle into Home Assistant (via the USB extension)
Never plug a Zigbee coordinator directly into the Home Assistant host—especially if your server has USB 3.0 ports. USB 3.0 noise is known to significantly interfere with Zigbee radio signals.
My mentioned 10ft USB extension cable is ideal because it allows me to:
- Position the coordinator away from the server
- Place it high and central in the house
- Avoid interference from metal racks, PCs, NAS units, etc.
Aim for 6–10 ft away from any electronics and line-of-sight where possible.
2. Use Zigbee2MQTT (recommended) or ZHA
Both will work, but Zigbee2MQTT tends to offer:
- Better device database support
- More debugging tools
- Greater flexibility
- Frequent updates
ZHA is simpler and native inside Home Assistant, so if you want the easiest route, use ZHA.
If you want the best ecosystem and flexibility long-term, Zigbee2MQTT wins.
3. Leverage Your Smart Plugs and Bulbs as Mesh Routers
Zigbee relies heavily on routers (mains-powered devices) to build a strong mesh network.
In my device list, the following work as Zigbee routers:
- THIRDREALITY Zigbee Smart Plugs
- THIRDREALITY Zigbee Smart Color Bulbs
Strategically placing these around your home drastically improves:
- Range
- Stability
- Sensor responsiveness
Place routers:
- Within 15–25 ft of one another for good overlap
- Near doorways, hallways, and high-traffic areas
- On each floor if you have multi-level housing
4. Add the Battery-Powered Sensors Last
Zigbee sensors connect best when the mesh is already built.
Order of pairing:
- Coordinator
- All plugs & bulbs
- Motion sensors
- Door/window sensors
- Temp/humidity sensors
This ensures each device finds an appropriate path and avoids weak links.
Device-Specific Notes & Tips
Aqara Motion Sensor P1
- Outstanding battery life
- Very configurable
- Fast detection
- Works great with Zigbee2MQTT
Potential issue: Aqara sometimes uses Zigbee quirks. They pair fine, but may not like poor mesh networks. Strengthen your mesh first.
Aqara Temperature & Humidity Sensors
- Compact
- Accurate
- Perfect for automation triggers
Potential issue: Same as the P1 sensors—they require a stable Zigbee routing environment.
Aqara Door/Window Sensors
- Excellent reliability
No major concerns—these are among the most reliable Zigbee contact sensors on the market.
THIRDREALITY Color Bulbs
These double as good mesh routers and provide:
- Color support
- Good brightness
- Full Zigbee local control
Potential issues: - They are not as fast as hardwired switches
- As bulbs, if someone cuts power at the switch, they drop from the mesh
Keep them in fixtures where the power stays on.
THIRDREALITY Smart Plugs
These are excellent choices for Zigbee routing. They also provide:
- Power monitoring
- Scheduling
- Strong radio range
Place them early in your setup.
Zigbee + UniFi: Avoiding Interference
One of the most common Zigbee problems comes from Wi-Fi interference, especially in high-performance UniFi environments.
Key rules:
1. Zigbee uses 2.4GHz just like Wi-Fi
I have a dedicated 2.4GHz IoT network—but it can still interfere if channels overlap. I believe I will create a new network just for Zigbee if needed, but I do not believe most of the Zigbee devices will need it (just potentially the hub)?
2. Set Zigbee to channel 15, 20, or 25
Recommended mappings:
| Wi-Fi Channel | Zigbee Channel That Avoids It |
|---|---|
| Wi-Fi 1 | Zigbee 20/25 |
| Wi-Fi 6 | Zigbee 15 or 20 |
| Wi-Fi 11 | Zigbee 15 |
Zigbee channel 15 is usually the safest universal choice.
3. Keep Zigbee devices off the 2.4GHz IoT Wi-Fi band
Zigbee is its own protocol, and does not join Wi-Fi—so there’s no technical overlap.
But RF interference still exists.
Positioning matters more than channel selection in real houses.
Potential Problems to Watch For
Weak mesh due to battery-only devices
Battery sensors do not repeat. If you put too many far from routers, you’ll see:
- Sensors dropping offline
- Delayed triggers
- Failed pairing attempts
Solution: add more routers (smart plugs are the easiest).
USB 3.0 interference
If you keep the Zigbee dongle near a USB 3 port or metal rack, you’ll get:
- Poor signal
- Random disconnects
- Dropped devices
An USB extension cable solves this—use it.
Aqara ecosystem quirks
Aqara devices work best on coordinator-based networks (Zigbee2MQTT or ZHA) but can behave poorly if the mesh routes through routers with incompatible behaviors.
THIRDREALITY routers seem fine, but avoid mixing in Tuya routers if you expand later.
Wi-Fi overpowering Zigbee
My E7 and U7 Pro throw strong 5/6GHz signals—but also still radiate some 2.4GHz.
If APs are too close to the coordinator, Zigbee signal can be drowned.
Place your coordinator:
- Away from APs
- Away from the server
- Ideally high in an open area
As my 2.4G WAP is in the middle floor of the house, I will try to mount the Zigbee dongle further away, while still centered as much as possible with the rest of the home.
Recommended Setup Workflow
- Install Zigbee2MQTT or ZHA
- Connect the SONOFF dongle via the 10ft extension cable
- Set Zigbee channel (15 recommended)
- Pair all smart plugs
- Pair the bulbs
- Pair motion sensors
- Pair temperature/humidity sensors
- Pair window/door sensors
- Set up automations (motion → lights, door sensors → notifications, etc.)
- Monitor device signal quality in Z2M or ZHA
- Adjust placement as needed
What You’ll End Up With
A rock-solid, local-first system that:
- Automatically lights interior or exterior pathways
- Monitors climate in key rooms
- Alerts you if doors/windows open
- Allows power monitoring and remote control of outlets
- Adds security-grade motion detection
- Operates even if the internet goes down
- Integrates seamlessly with Alexa and Google devices
Conclusion
I believe my selected hardware is excellent, my Home Assistant environment is ready, and with a few strategic decisions—USB extension, correct Zigbee channel, mesh building order—I’ll end up with a truly professional-quality smart home foundation.
I think I will get this all ordered shortly, so I will share my experience with the products soon!
The Build
What a merry Christmas! I received all of the abovementioned sensors and got everything installed over the weekend. The install was a breeze, with literally no issues during any of the integrations into HomeAssistant. The USB Zigbee dongle with the USB extender works flawlessly and have it installed in the utility room rack. I opted to use the 3 door/window sensors for the front windows on the main level, as those are really the only windows that would allow easy access. I then installed 2 of the motion sensors in the hallways to the top and basement floor, and one on the path to the front door outside. I also got the new smart lightbulbs installed, as well as some older ones I had. As of now, I have 3 smart bulbs in my bedroom, 2 in the basement living room, and one in my basement office. I opted to just add the new bulbs to my existing Philips Hue setup instead of going the Zigbee route, but I may end up going back to the Zigbee network if I find I need the extra coverage (bulbs act as repeaters I believe).
I am still tinkering around with placements and automations, but would eventually like to do a few things:
Entry/exit light enabling/disabling for basement lights (based on motion)
Outside front door walkway sensor alerting presence
Door/window sensors alerting status
And finally, getting all of the above automations synced up to Alexa/Google for voice alerts
Now that I have my Zigbee network operational, it is time to expand on it. Here is what I will add next:
Temperature sensors
Air quality sensors
CO2/Smoke sensors
More smart bulbs (need tons)
More door/window sensors (each window and door)
More motion sensors (would like at least 1 on each exterior wall of the house, as camera coverage is limited)
Custom automations and HomeAssistant dashboards: Once I get all of the sensors installed, I need to tie everything together and make the controls easy to use. I have seen some really cool dashboards with a 3D floor plan showing all of the different sensors and devices in each room, allowing the user to just select what they want to turn on, as an example.
I didn’t have a chance to take pictures of everything yet, but will update this post shortly.
Categories: Networks


