


In the realm of customizing expensive cars, the little, inexpensive things often make the most difference. For Christmas, I got some paddle shifter extensions for my 2017 BMW 750i xDrive, and within minutes, I had them installed and was effortlessly banging through the 8 speeds of my gearbox. Well, for the most part! As I saw in reviews, the Jaronx Metal Paddle Shifter Extensions’ installation was rather challenging due to the poor quality of the included adhesive. However, I planned accordingly! In this post, we’ll explore the purpose, benefits, and step-by-step installation of paddle shifter extensions on a BMW equipped with factory paddle shifters (the process will be similar on most models).
What Are Paddle Shifter Extensions?
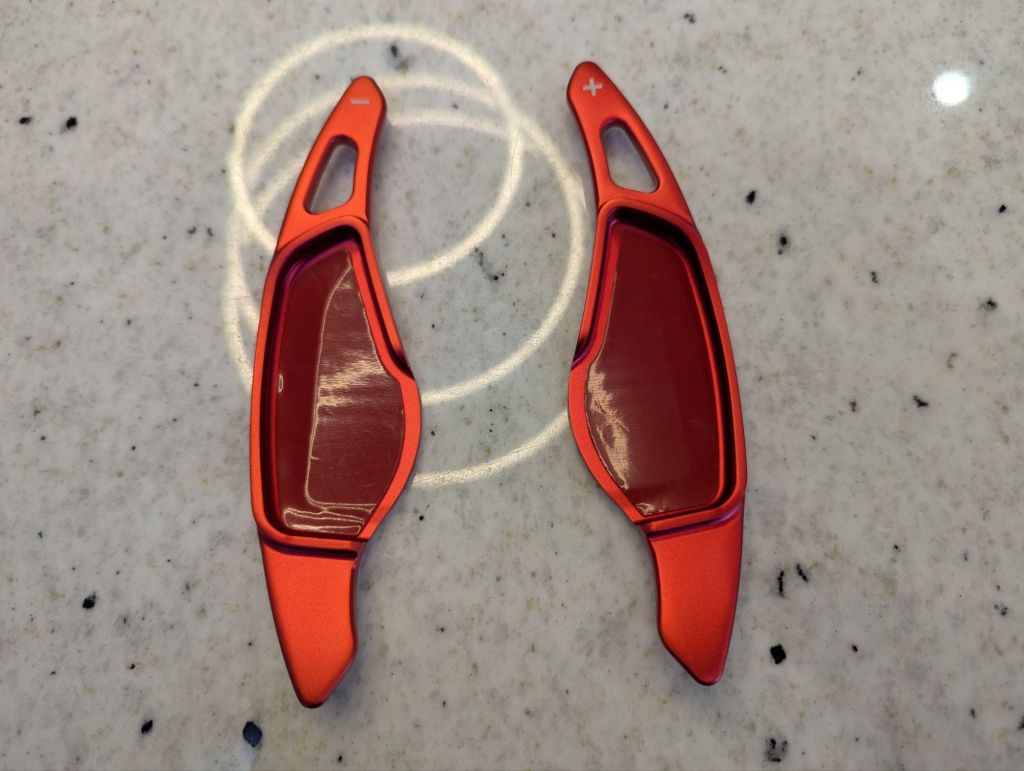
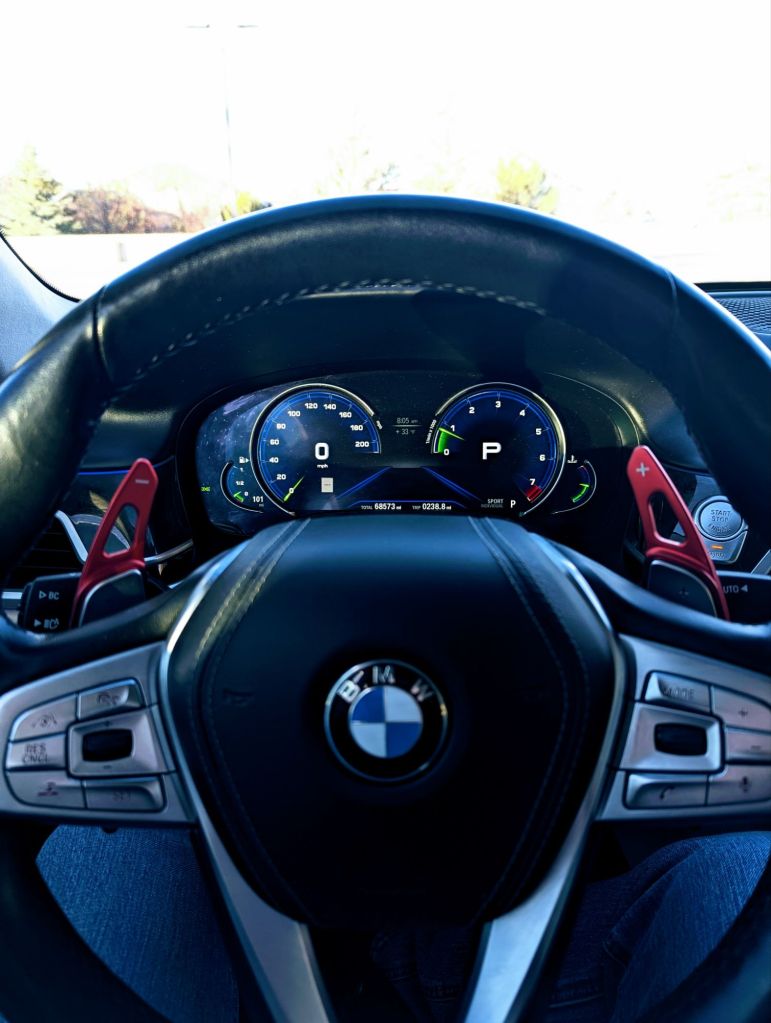
Paddle shifter extensions are aftermarket accessories designed to increase the size and reach of the factory-installed paddle shifters on a vehicle’s steering wheel. They are typically made from durable materials like metal or high-quality plastics and attach directly to the existing paddles using adhesive or mechanical fasteners. My BMW 750i is equipped with factory paddle shifters, but they are quite hard to reach, especially when taking hard corners while shifting. So, paddle shifter extensions are a cheap way to get the shifting characteristics of say, a BMW ‘M’ car, for a fraction of the price. I do admit the better way to do this would be to purchase an entire kit, but that involves removing the steering wheel and such, something I am not comfortable doing on a car such as this!
Benefits of Paddle Shifter Extensions
- Improved Accessibility:
- Larger paddles provide better reach, allowing you to shift gears more comfortably during spirited driving or while navigating tight corners.
- Enhanced Aesthetics:
- Premium paddle extensions, like those from Jaronx, add a touch of luxury and sportiness to your car’s interior.
- Better Control:
- Increased surface area improves grip and control, especially for drivers with larger hands or when wearing gloves.
- Personalization:
- Extensions offer an opportunity to tailor your vehicle to your driving style and preferences.
Preparing for Installation
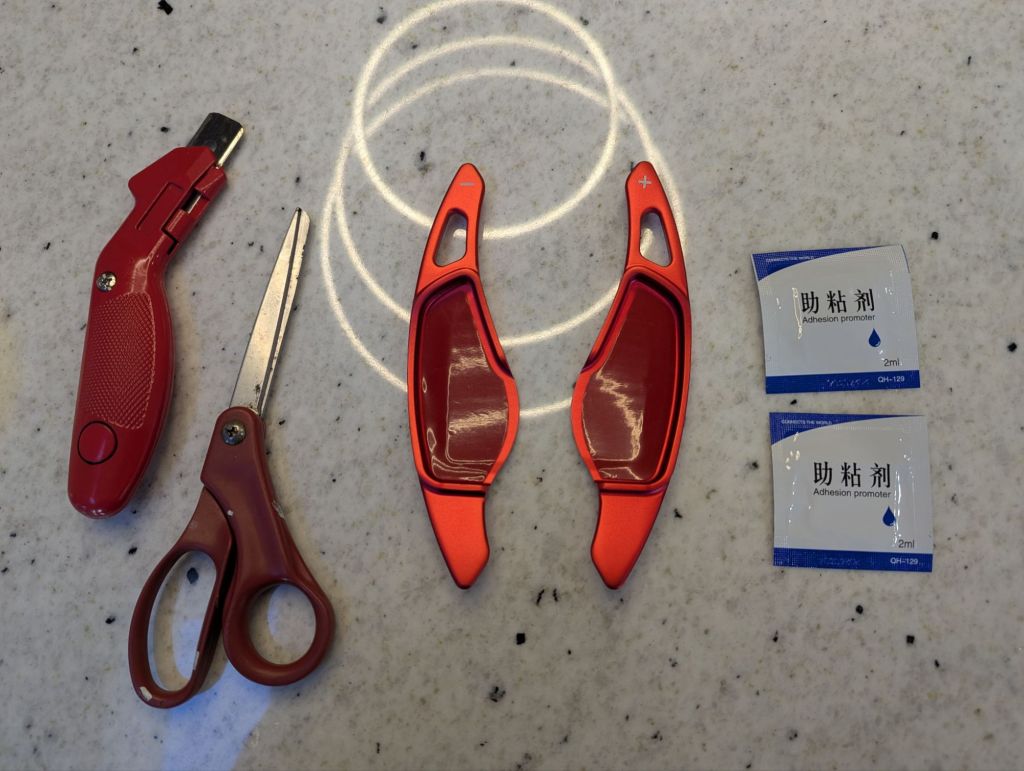
Before you begin, gather the following tools and materials:
- Paddle Shifter Extensions (left and right)
- Cleaning solution (e.g., isopropyl alcohol)
- Microfiber cloth
- Gorilla Tape (or another reliable adhesive if the supplied glue is insufficient)
- Optional: Tweezers or a small applicator for precise tape placement
Step-by-Step Installation Guide
Step 1: Clean the Factory Paddle Shifters
Proper adhesion requires a clean surface:
- Wipe the factory paddle shifters with isopropyl alcohol and a microfiber cloth to remove any dirt, grease, or residue (the included cleaning pads were both completely dry and offered no real use, so I would recommend just using some alcohol wipes).
- Allow the surface to dry completely before proceeding.
Step 2: Apply Adhesive to the Extensions
The adhesive is critical for a secure bond:
- Inspect the adhesive tape provided with the kit. If it appears insufficient, prepare a stronger alternative, like Gorilla Tape (I had a few options of different brands of double-sided tape and found that the Gorilla Tape was the best when cutting sections to fit perfectly in the recessed section of the paddle extensions, but it took a few tries on each side to get the perfect fit and adhesion).
- Cut the adhesive to fit the contours of the paddle extension precisely.
- Use tweezers or a small applicator for precise placement to avoid wrinkling or gaps.
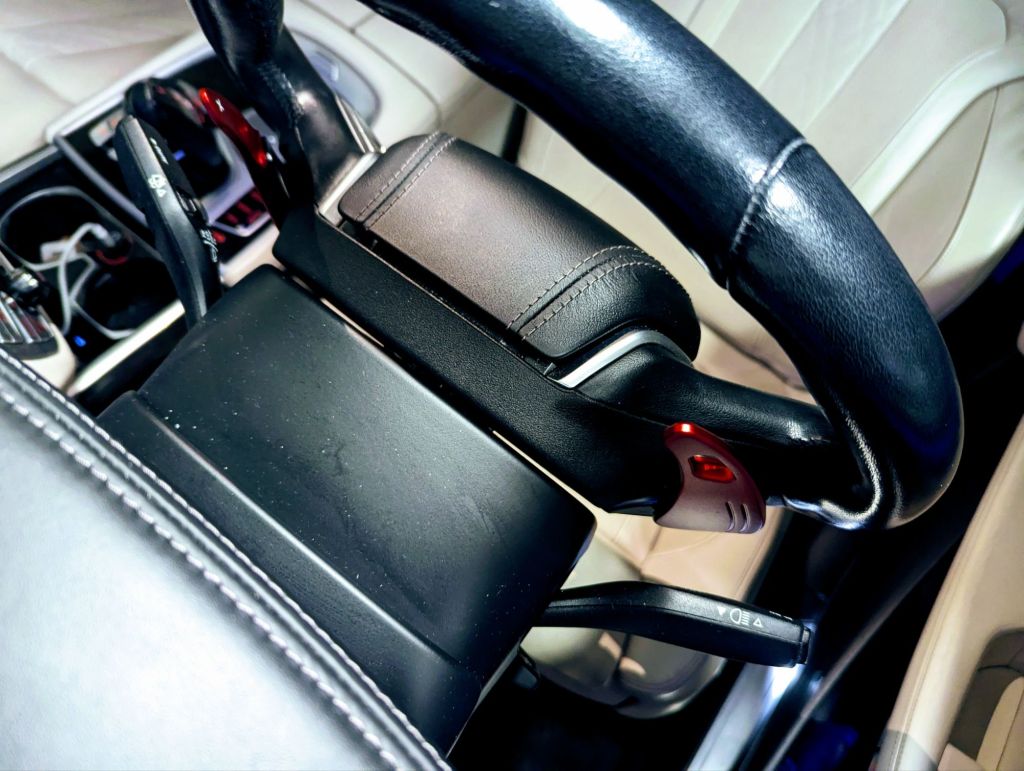
Step 3: Align and Attach the Extensions
- Position the paddle extension over the factory paddle shifter, ensuring proper alignment.
- Press firmly for 30-60 seconds to activate the adhesive.
- Be cautious not to shift the extension during this step.
Step 4: Check the Bond
- Gently test the attachment by applying light pressure to the extension edges.
- If the bond feels loose, repeat the process with additional adhesive as necessary.
Step 5: Allow Time for Curing
- For optimal results, let the adhesive cure for 24 hours before aggressive use.
My Thoughts on the Installation Process
While the installation process is straightforward, I encountered some challenges with the supplied adhesive. Here’s what I learned:
- Adhesive Issues: The glue included in the Jaronx kit was ineffective. I ended up using Gorilla Tape, which worked better, but even then, it took a few attempts to achieve the desired bond. Patience is key here.
- Ease of Installation: Overall, the project was simple and beginner-friendly. The most time-consuming part was ensuring a secure attachment.
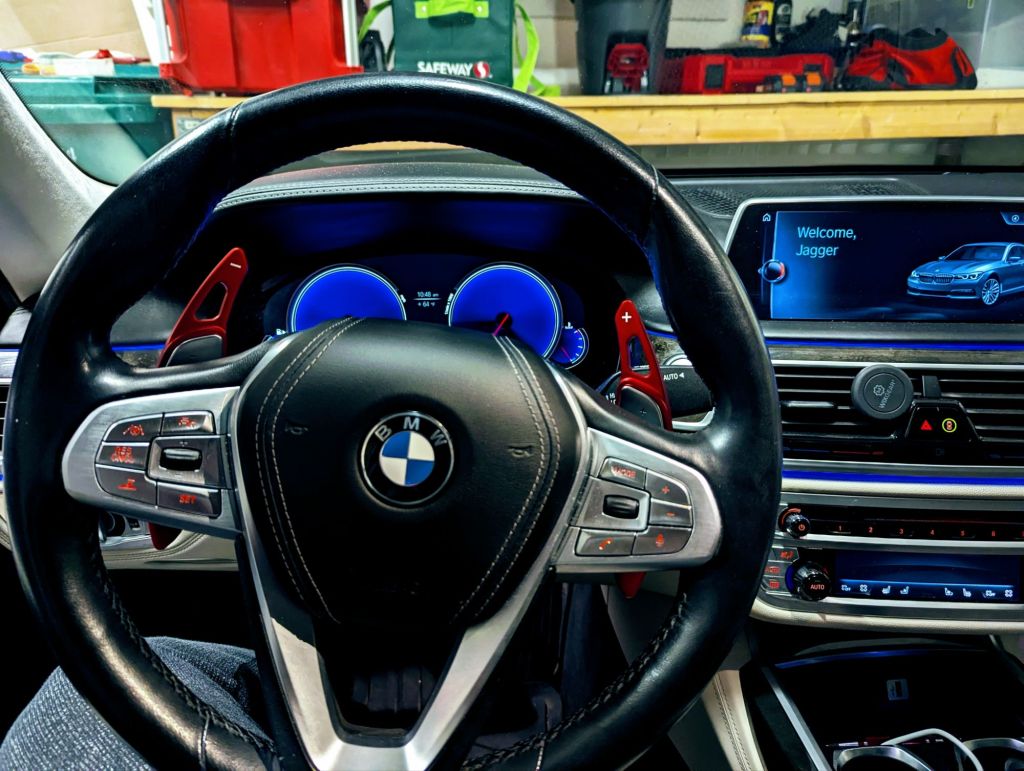
- Performance Improvement: The larger paddle size makes shifting significantly easier and more intuitive, especially during spirited driving. The extensions also give the steering wheel a sportier and more refined look.

Final Thoughts
Installing paddle shifter extensions like the Jaronx Metal Paddle Shifters on a 2017 BMW 750i xDrive is a worthwhile upgrade. Despite minor challenges with the adhesive, the process is manageable, and the results are immediately noticeable in both functionality and style. While I still have my doubts about whether the extensions’ adhesive will hold up after some time, I do not notice any movement from the extensions when shifting, at least during my first drive to work. If you’re looking to enhance your driving experience, this simple modification is a great place to start.
Happy driving!
Categories: Random Thoughts


